Setting up a MySQL Database for Production
SQLite is a very useful database engine for the development stage, since there is no need to install additional software and it is very well integrated with Python. However, it is not that suitable for production usage. SQLite databases are simply files on the system, and as such have certain limitations: two processes cannot simultaneously write to the same file. Furthermore, in cloud services such as PythonAnywhere, file system access is usually a heavier operation than its equivalent database query.
Generally speaking, MySQL is a good solution for the production environment. Additionally, PythonAnywhere provides free support for this database engine. Therefore, you should configure your application to make use of it. To achieve this, you first have to create a MySQL server on PythonAnywhere. Go to the Databases tab and choose a password:
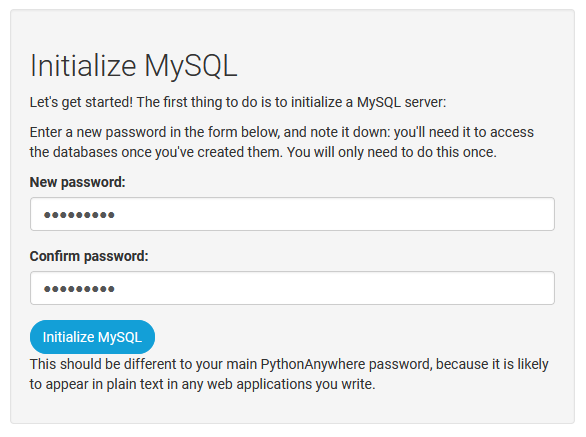
Press the Initialize MySQL button and wait a few seconds until the process is completed. Once finished, you will see something like the following:
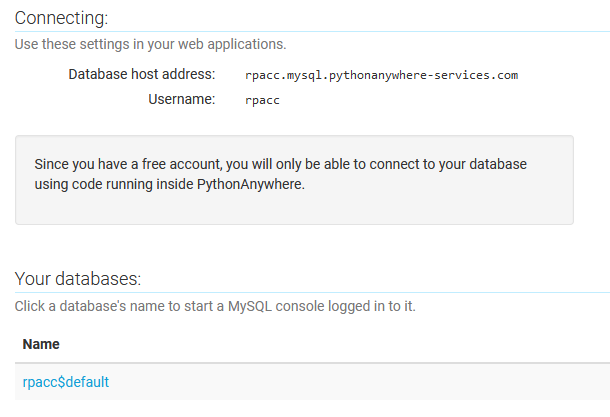
The first two rows indicate the address where your MySQL database server is hosted (which has the structure <username>.mysql.pythonanywhere-services.com) and your username for authenticating in such server. Under "Your databases," you will see a link with the name of the database created by default (<username>$default).
Remembering this information, let's make the appropriate changes to settings.py so that the project starts working with the MySQL server provided by in PythonAnywhere. Find the following section in your project's settings.py:
DATABASES = {
    'default': {
        'ENGINE': 'django.db.backends.sqlite3',
        'NAME': BASE_DIR / 'db.sqlite3',
    }
}
This SQLite database configuration was automatically generated by the python manage.py startproject command, allowing us to quickly get up and running with Django without having to deal with initializing and configuring a database engine. It is time to specify that you want to work with a MySQL database:
DATABASES = {
    'default': {
        'ENGINE': 'django.db.backends.mysql',
        'HOST': 'username.mysql.pythonanywhere-services.com',
        'USER': 'username',
        'PASSWORD': '<your-password-here>',
        'NAME': 'username$default',
        'CHARSET': 'utf8',
    },
}
Note that the values in 'HOST', 'USER' and 'NAME' are those shown in the previous image. Remember to change "username" to your username and "your-password-here" to the password you entered when initializing the database server in PythonAnywhere.
Settings are ready. Now upload the updated settings.py to PythonAnywhere again. Since you changed the database, you need to apply migrations. Open a bash console under /home/<username>/myproject/ (in PythonAnywhere!) and run:
python3.10 manage.py migrate
This will define the database tables for all the applications configured in your project, including, of course, those derived from the models in myapp/models.py.
Last but not least, go to the Web tab and reload via the Reload button so that the application starts working with the new database.
If you have a MySQL database server installed locally, you can use it during local development to replace SQLite. To do this, you must indicate the values corresponding to your local installation in the 'HOST', 'USER', 'PASSWORD' and 'NAME' keys. Additionally, it is necessary to install the module used by Django to interact with MySQL via pip install mysqlclient, which is installed by default in PythonAnywhere.