Setting up the Django Admin Site
Up to this point we have been inserting information into the database using mainly the Django interactive console. Of course, if you are developing a web application, for example, to manage courses and teachers, you must provide the end-user with the corresponding views to, at least, submit courses and teachers. We had already solved the case of courses submission using a ModelForm and the new_course() view. But we should still implement views to add teachers, to edit a course or teacher, to delete them, etc.
The Django site admin can help us with this task. It is an application built into the framework that generates views to create, read, update and delete (CRUD) instances of our application models. Let's see how it works. Remember that a Django project is made up of one or more applications. When you create a new project via django-admin startproject, this command adds several default applications to the project. Thus, you can observe in myproject/settings.py:
INSTALLED_APPS = [
    'django.contrib.admin',
    'django.contrib.auth',
    'django.contrib.contenttypes',
    'django.contrib.sessions',
    'django.contrib.messages',
    'django.contrib.staticfiles',
    'myapp.apps.MyappConfig'
]
The first application named django.contrib.admin is the Django admin site. To finish the setup of this application, you must incorporate its URLs into your project. In myproject/urls.py, change this code:
from django.urls import path, include


urlpatterns = [
     path("myapp/", include("myapp.urls"))
]
For this one:
from django.contrib import admin
from django.urls import path, include


urlpatterns = [
     path("myapp/", include("myapp.urls")),
     path("admin/", admin.site.urls)
]
This means that, just as the URLs and views that we have been working on so far in myapp began with the myapp/ prefix, we are configuring the URLs of the Django admin site to begin with admin/, which is the convention that generally is adopted.
Now go to http://127.0.0.1:8000/admin/ and you will see the following:

If we just mentioned that the Django Admin generates views to work with our models, you will not expect it to allow you to do so without a username and password. Django takes application security very seriously, which is convenient, since you don't want anyone with access to your application URL to be able to create courses and teachers!
So let's take it a step further and generate a username and password to manage the site by running:
python manage.py createsuperuser
you will be asked for a username, email address and password. If you enter everything correctly, you should see:
Superuser created successfully.
Return to http://127.0.0.1:8000/admin/, enter the newly created username and password and log in:
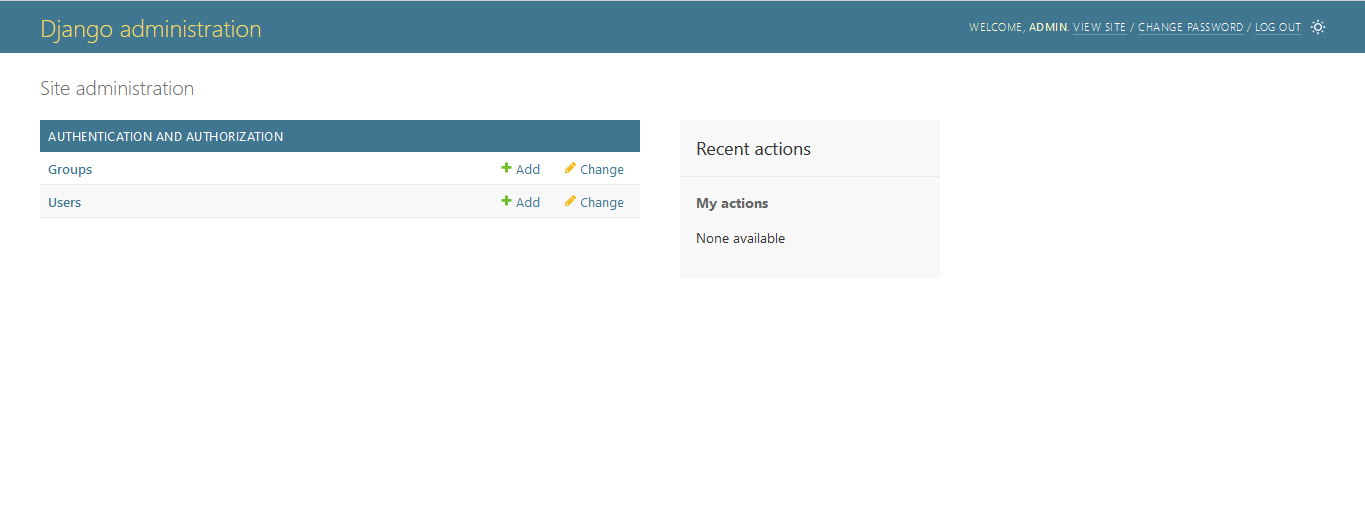
What you are seeing is two models defined by the django.contrib.auth application (remember the INSTALLED_APPS list that mentioned above), Groups and Users, on which the Django Admin site lets you execute CRUD operations.
Now, we want our own models (Course and Teachers) to be able to be managed from the Django administration. To do this you have to register these models in the application. Notice that the python manage.py startapp command already created the myapp/admin.py file for that purpose, which by default contains the following:
from django.contrib import admin

# Register your models here.
Within admin.py you will indicate which models you want to be able to be managed in the Django admin site. So, let's register our models:
from django.contrib import admin
from .models import Course, Teacher


admin.site.register(Course)
admin.site.register(Teacher)
Return to the administration and you will now see:
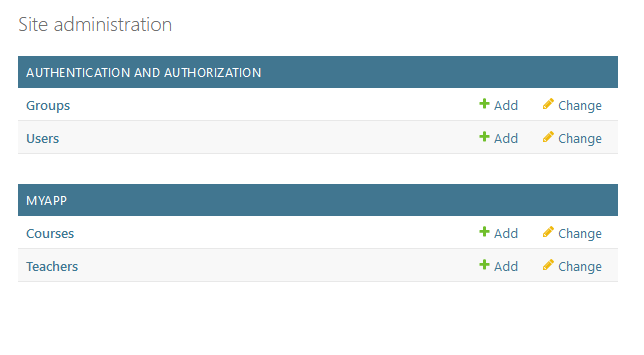
Perfect! Note that Django displays the models' names in plural. Sometimes Django might be wrong, or maybe you just want to use a display name that differs from the class name. In that case, you can define a metadata class inside the model to customize these kind of things. For example, if you want to display "Professor(s)" instead of "Teacher(s)":
# In models.py

class Teacher(models.Model):
    name = models.CharField(max_length=128)
    full_time = models.BooleanField()

    class Meta:
        verbose_name = "Professor"
        verbose_name_plural = "Professors"
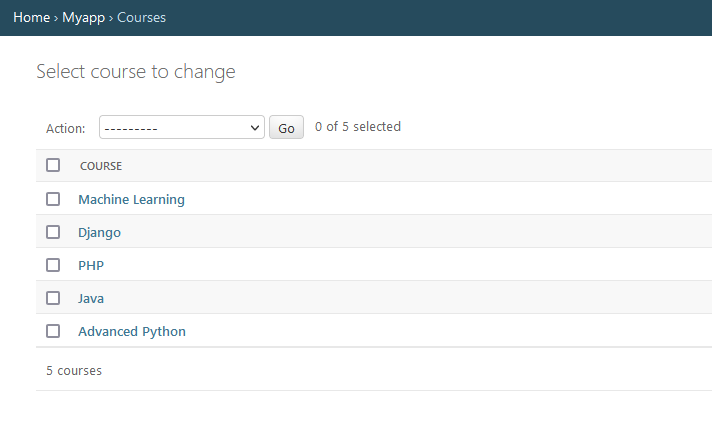
Now if you click on the “Courses” link, you will see a list of courses stored in the database:
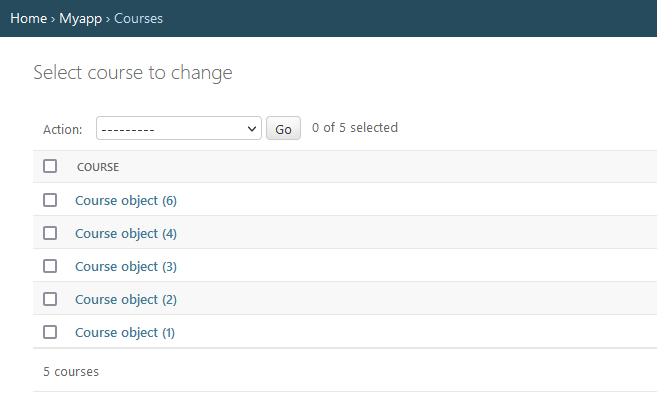
What do those "Course object" mean? Each model has a string representation, which is retrieved when converting a model instance to a string via str(). By default, the representation of each model is “ModelName object (id)”. To change it, you must define the special method __str__() within the model definition. For example:
class Course(models.Model):
    name = models.CharField("Name", max_length=128)
    enrolled_students = models.IntegerField("Students")
    TIMES_OF_DAY = (
        (1, "Morning"),
        (2, "Afternoon"),
        (3, "Evening")
    )
    time = models.PositiveSmallIntegerField("Time", choices=TIMES_OF_DAY, null=True)
    teacher = models.ForeignKey(
        Teacher,
        on_delete=models.SET_NULL,
        null=True,
        related_name="courses"
    )

    def __str__(self) -> str:
        # The result of this function is used by the Django admin site.
        return self.name
What we are indicating here is simply that we want the representation of each course to be its name, which is a string. Now you will see something like:
You can do the same with teachers, but maybe you want to display when he/she is a full-time employee:
class Teacher(models.Model):
    name = models.CharField(max_length=128)
    full_time = models.BooleanField()

    class Meta:
        verbose_name = "Professor"
        verbose_name_plural = "Professors"

    def __str__(self) -> str:
        output = self.name
        if self.full_time:
            output += " (full-time)"
        return output
Great! With these small configurations, you already have a nice course and teacher manager: